Call me naive, but I really thought life would instantly (and moreover, permanently) get easier once The Mistah got back from Deployment. I’m not even talking about being a solo parent. That’s the part that everyone can see and understand and expect to be hard. I’m talking about being a family again.
I love to tell people the story about the day The Mistah came home. I didn’t tell Miss Libby that her dad was coming home. It was just another Friday and we were out running errands and I mentioned we had to make one more stop at the airport. Without missing a beat, she asked if we were picking up Daddy…stinking smart, that one. The image of her running up to him as walked off the plane is seared into my memory and it was as perfect as anything you could imagine.
If this were Hollywood, that’s where the story would end….our family reunited, all is well, and the three of us walk through the airport into our perfect lives….fade to black.
But this is definitely not Hollywood. There were bags to wait for. There was a 5 year old who didn’t want to listen. There was frustration about not being able to remember where I had parked the car. There were empty stomachs and whiny voices and a whole lot of ohmygodwillyoupleasejustpayattentiontowhereyouarewalking…exclamation point.
The family was reunited and all was well….and we did eventually find the car. But after spending almost a year apart, we had to figure out how we fit together again. That’s where we are now. I am trying to remember how to be a spouse and a momma and a grown up. At any given time, I’m struggling with one, two, or three of those roles.
And. Every. Damn. Day. I have to remind myself the The Mistah can’t read my mind.
Seriously, after 14 years of marriage you would think that one was squared away. But indulge me for a moment…. shouldn’t he be just a little more insightful after all these years together? Maybe a tiny bit?
My point is…it’s hard for me to ask for help but the truth is that he only knows I need something if I ask.
My point is…being vulnerable with people stirs up all kinds of anxiety for me but they only know how I’m feeling if I tell them.
My point is…I tend to be the proverbial bull in a china shop but there much less debris to clean up if I can take a bit more care with my words and actions.
My point is…in lieu of a Google Maps Your Life app, we will have to rely on each other to find our way. At least now I don’t have to be the one who remembers where the car is parked.
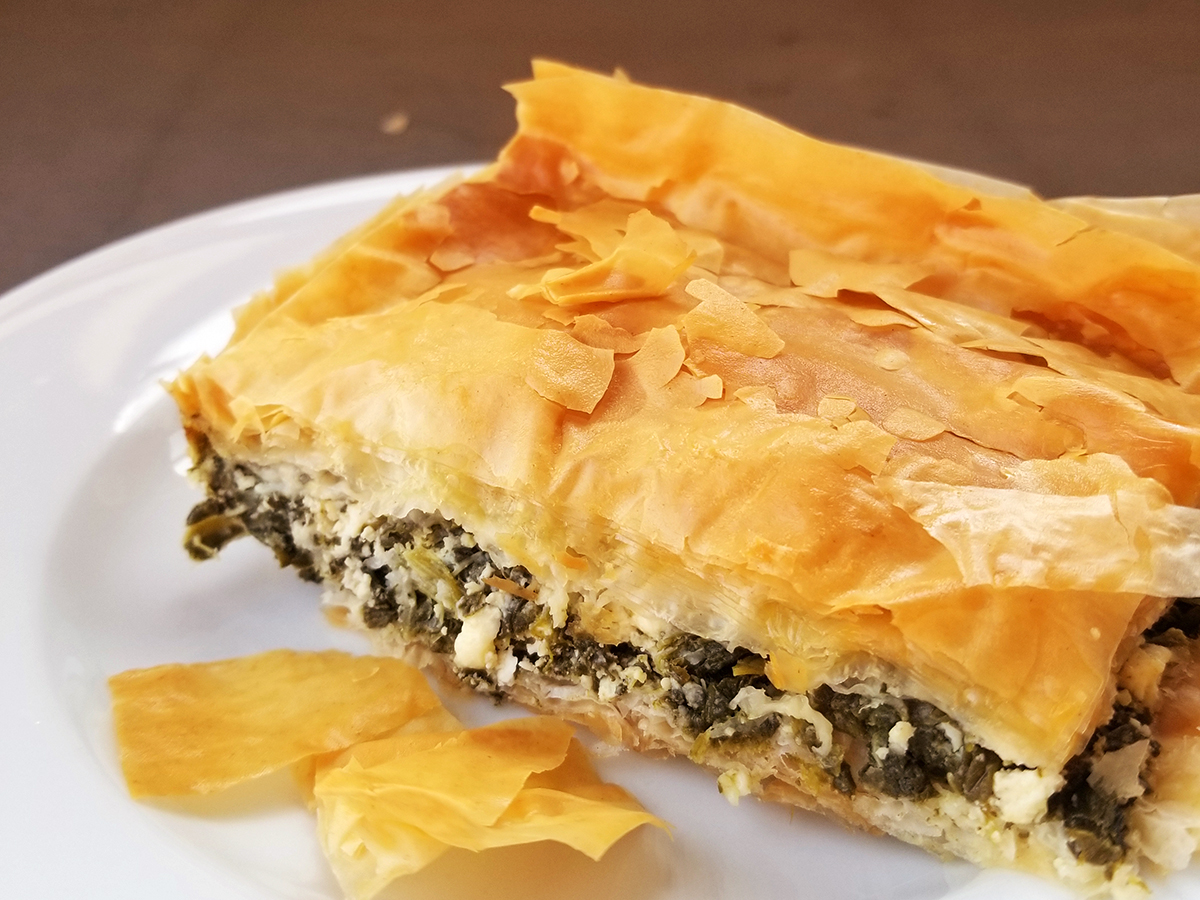
Spinach Pie
Adapted from The Washington Post
BAH Note: I had a fear of working with phyllo dough. I needn’t have. Since this approach gives you one big spinach pie instead of individual triangles, you can be a little less precise and it doesn’t matter one bit if the sheets tear or get scrunched up and folded over in the pan…it adds to the layers. Don’t skimp on the olive oil between the top layers of phyllo. They will thank you by baking up crisp and wonderfully crunchy.
Want to make it ahead, here’s verbatim from The Post. “The unbaked pie can be refrigerated for up to 1 day; add 10 minutes to the baking time. It can be chilled in the refrigerator, wrapped in plastic and aluminum foil and frozen or up to 3 months; reheat by placing it in the oven during the time it preheats to 375 degrees; once it reaches temperature, bake for 45 minutes. The baked pie can be cooled completely, then refrigerated for up to 4 days; reheat uncovered in the oven as it preheats to 350 degrees. Once it reaches temperature, bake for 20 to 30 minutes.”
- 24 – 30 ounces frozen chopped spinach, defrosted and squeezed dry
- 7 ounces crumbled feta cheese
- 8 ounces cottage cheese
- 2 eggs, quickly beaten
- ½ package phyllo dough sheets…they usually come two rolls per box
- 1 teaspoon kosher salt
- Olive oil
Combine the spinach, feta, cottage cheese, and eggs in a mixing bowl. Unroll the phyllo and place a damp paper towel over it while you work.
Brush the bottom of a 9x13x3 baking pan with olive oil. Place one sheet of phyllo in the pan, folding as needed to fit. Brush the dough lightly with olive oil. Continue to layer and brush with oil until you’ve used about half of the dough.
Spread the spinach mixture on top of the phyllo layers. Top with the remaining sheets of dough continuing to layer and brush with olive oil as before.
Use a sharp knife to cut the pie into six or eight sections and then bake at 375 degrees until the top is a beautiful flaky golden brown, approximately 30 to 45 minutes.
{printable link}