Pam’s Instant Strawberry Ice Cream

to post graphic

I’ve been digging around the junk drawer that is my draft folder.  In a concerted effort to clear out the mental clutter, I’m posting this drafts ‘as is’….

Pam’s Instant Strawberry Ice Cream

Adapted from Three Many Cooks

BAH Note:  I parted ways with my ice cream maker but sometimes I just want a creamy, frozen treat.  Thanks to Pam Anderson, I can make that happen.  There were some great tips and suggestions about substitutions in the comments section of Pam’s post….you might want to clicky on over and take a look.

  • 1 pound frozen strawberries
  • 1/2 cup agave nectar
  • 3/4 cup evaporated milk
  • 1/8 teaspoon kosher salt

Combine all ingredients in a blender and blend on high, stopping once or twice to scrape down/stir, until fairly smooth with bits of strawberries throughout.  Serve immediately for a very soft serve consistency or transfer the ice cream to a container and allow to set up briefly in the freezer.

{printable recipe}

Ice Cream Cake

ice cream cake

Over the last four or five years, the Universe has developed a habit of taking the snow globe that is my life and shaking the hell out of it during the month of July.  For reasons that are beyond me, the Universe prefers to unleash a world of change on me in the dead of summer.  This year the change left me profoundly sad as I said goodbye to my companion of ten years.

Shadow came into my life during The Mistah’s first deployment.  He’d had one owner for eight years, and like me, suddenly found his world turned upside down.  We bonded quite quickly and his energy filled the empty space in the apartment.  He gave me predictable and dependable when everything else around me was anything but.

He eventually accepted The Mistah, but Shadow was my cat and I was his person.  Back when he could still jump up on the bed, he would often wedge his considerable self between the wall and my head during the night.  It was not unusual for me to wake up in the morning with cat head.  One of us clearly enjoyed this more than the other.

Most of the time he wanted to be near you but not in your lap.  So he would reach out and gently lay a paw on your arm or leg or shoulder, just to say “here I am”.  He had a weakness for deli meat and would double time it to the kitchen at the first crinkle of lunchmeat coming out of the bag.  And even as the years made it more and more difficult for him to walk, he would still climb the stairs when he heard the shower running so that he could get into the tub for a drink after the water had been turned off.  I cleaned as much cat hair out of our tub as I did human hair.

He was so old by the time Libby came along that she never had a chance to win him over.  And she so desperately wanted to be his friend.  Her first word was cat.  She learned to crawl because she didn’t want Shadow to get away from her.  Her first chore in the house was putting a scoop of food in his dish each morning.  Even though he was an unwilling participant, so many of her “firsts” had something to do with that cat.

His decline was sudden and swift.  In the three days between making the appointment with the vet and the day of the appointment, I knew that our time together was coming to an end.  So I made him a little bed to go next to his food and water….which he totally ignored.  And I spent extra time giving him quiet scratches and brushing his long, silky coat…which he totally loved.

Then on his last morning, I wrapped him in a towel and gave him an hour outside with the sun on his back and a gentle breeze in his face. I cried.  I stroked his fur.  I cried some more.  I thanked him for being such a wonderful part of our family and promised him that I would stay with him to the very end.

And I did.  I held him as the vet gave him the first shot.  We sat quietly, tears blurring my eyes, and he buried his head in the crook of my arm just as he had done so many times before.  He trusted me completely and I felt like I was betraying that trust as the vet administered the second shot.  Just like that, he was gone.

Taking away the food and water dishes, their empty space on the floor looked out of place.  And I cried.  Sweeping up the last bits of his fur from the floor felt like I was erasing him from the house.  And I cried some more. Now, coming into a room and expecting to see him is met with disappointment.  Watching Libby look under the table and ask “where’s Shadow” is like getting punched in the stomach.

But time doesn’t stop because we are sad.  And two days after I said goodbye to Shadow I celebrated Libby’s 3rd birthday.  My sadness and my joy stood side by side, took my hand, and together we got through it.  After the presents had been opened and the last of the guests had left and Libby was finally in bed, all was quiet.

In that silence, I could feel the absence of what had been and gratitude for all that it was.
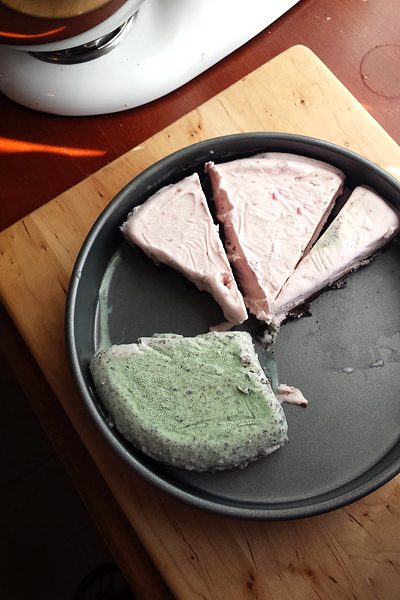
Ice Cream Cake

BAH Note:  This is the cake I made for Libby’s 3rd birthday.  I won’t say that I wasn’t thinking about Shadow as I worked but it’s really hard to be sad when butter, chocolate, and ice cream are around.  You can use whatever cake you like. I won’t even blink an eye if that happens to be a box of cake mix.

    • Chocolate cake (see below)
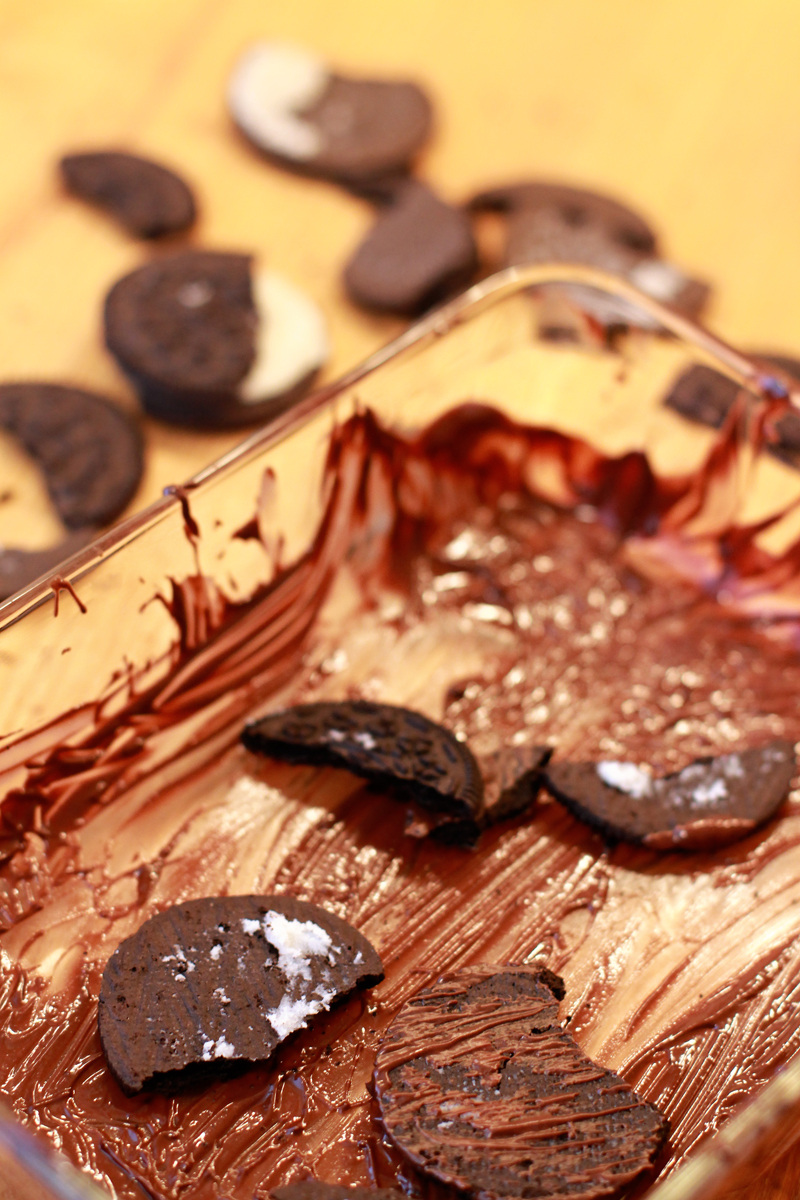
    • 8 ounces chocolate wafer cookies, such as Brownie Batter Thins (if using Oreo, remove the vanilla filling)
    • 1/2 gallon ice cream, store bought or homemade, slightly thawed

Prepare a 9 inch cake pan by laying several layers of plastic wrap across each other, pressing them down into the pan, with the ends hanging well over the edge like a sling.

Use a food processor to blitz the half the wafer cookies into crumbs.  Add half of the cake in large chunks and continue to process until the cake is also turned into crumbs.  Transfer the mixture to a large bowl and repeat the process with the rest of the cookies and cake.

Using a large spoon or spatula, give the cake and cookie crumbs a good stir and then transfer about 1/3 of the crumbs to the cake pan.  Use something with a flat bottom (water glass, ramekin, smaller cake pan, etc) to press the crumbs into a single layer in the pan.  Repeat the process, using anywhere from 2/3 to of all the crumbs.

Scoop approximately 1/3 of the ice cream into the work bowl of a stand mixer fitted with the paddle attachment.  Mix on low just until it starts to smooth out, stopping to scrape the ice cream from the paddle as necessary.  Repeat until all the ice cream is in the bowl, increase the speed to medium, and mix until the ice cream is a spreadable, soft serve consistency.

Top the cake crumbs with the ice cream and use a spoon or spatula to smooth out the ice cream into an even layer.  Cover the pan with plastic wrap or aluminum foil and transfer to the freezer (a few hours or overnight) for the ice cream to set.

When ready to serve, remove the pan from the freezer and uncover the top.  Grab the ends of the plastic wrap hanging over the cake pan like a sling and use them to pull the cake out of the pan.  Transfer the cake to a large serving plate, removing the plastic wrap from the bottom, and allow to thaw slightly before slicing and serving.

Chocolate Butter Cake
Adapted from Rose Levy Beranbaum

BAH Note: Knowing that I was going to turn the cake into crumbs, I baked all the batter in a single 9” cake pan…because why prep and dirty two pans when all I need is one.  I had a moment of doubt as the cake batter creeped closer and closer to the edge of the pan and then flirted with panic as my baking time hit 40 and then 45 minutes.  I’m pleased to say it turned out ok in the end.

  • 2 1/4 ounces (1/3 cup) unsweetened cocoa powder, preferably Dutch process
  • 8 ounces (1 cup) boiling water
  • 3 large eggs
  • 2 1/4 teaspoons vanilla extract
  • 8 1/4 ounces (1 3/4 cup + 2 tablespoons) cake flour
  • 10 1/2 ounces (1 1/2 cups) granulated sugar
  • 1 tablespoon baking powder
  • 3/4 teaspoon salt
  • 6 ounces unsalted butter, softened

Combine the boiling water and cocoa powder in a small bowl and stir until thoroughly combined.  Allow the cocoa mixture to cool.

Once the cocoa mixture is cool, heat your oven to 350 degrees, line one (or two) 9 inch cake pan with parchment, and lightly spray with cooking spray.

Place the flour, sugar, baking powder, and salt in the work bowl of a mixer and mix on low briefly to combine.

Crack the eggs into a small bowl and stir in ¼ of the cocoa mixture plus the vanilla.

Add the remaining cocoa mixture plus the butter to the dry ingredients and mix on low until just combined.  Increase the speed to medium and mix approximately 2 minutes or until the batter gets smooth and lighter in color.

Add 1/3 of the egg mixture, beat until just combined, and scrape down the bowl.  Repeat two more times until all of the egg mixture is mixed in.

Pour the batter into the prepared cake pan(s) and bake on the center rack until the edges start to pull away from the side of the pan and a tester inserted in the center of the cake comes out clean.  If you divided the batter between two pans, baking time is approximately 25 to 35 minutes.  If you baked all the batter in a single pan, start checking at 35 minutes but be prepared to bake for 40 to 50 minutes.

Allow the cake to cool in the pan for 10 minutes before turning it out to cool completely on a wire rack.

{printable recipe}

Easy Chocolate Cupcakes

cupcake
would this face lie about a cupcake?

Life, in general, is not easy.  Life with a toddler, specifically, is not easy.  Especially when it comes to matters that concern the safety of said toddler, life is not easy.

Toddlers don’t understand that you don’t run out into the street….everything is a game of catch me.  Toddlers don’t consider that a car may come around the corner at any second when they decide to park their bottom in the middle of the road…walking from the car to the house takes a lot out of you and sometimes you just need to rest, geez momma.

Toddlers, much like Honey Badger, don’t care.  But as their parents, we do.

So it is that I’ve been on the hunt to repair the fence in our front yard.  Thanks to the driving skills of our neighbors, our fence has been hit, banged, knocked, and generally whacked out of service.  The posts are so far out of alignment that the gate can’t latch closed, the top rail isn’t connected to anything, and the chain link itself has pulled away from the posts leaving huge gaps.

Exactly the kind of gap that a toddler can use to make a break for it.

With the promise of a thaw from this endless winter, at some point we will want to be out in the front yard.  But before that can happen, the breach must be secured.  Never, in my wildest imagination, did I expect to pay nearly two month’s worth of mortgage payments for some metal posts, chain link mesh, and a gate.  And yet I am about to sign a contract to do just that.

If it gives me one less thing in life with toddler to worry about, I’m all for it.  And when you come visit me in the poor house because I’ve gone broke paying for the fence, please bring these cupcakes.  They are easier than most moments of life with toddler….and they are pretty freaking delicious.

Easy Chocolate Cupcakes

Adapted from Smitten Kitchen

I’m already planning on making these for Miss Libby’s birthday.  They are what my memory says is a perfect birthday cake…moist, tender, and frosted with indulgence.  Seriously, my frosting was almost too sweet because for some reason I only used 1 ounce of unsweetened chocolate.  For more balance, use the full 2 ounces.

BAH Note: According to The Smitten, this makes one dozen cupcakes or one 8 OR 9 inch cake, so plan accordingly.  The Smitten also provided both volume and weight measures, so they are below.  But if you ask me, it’s so much easier to weigh out your dry ingredients….because hello, precision.  But you use what you’re most comfortable with.

Cake

    • 6 tablespoons (85 grams) butter, at room temperature
    • 3/4 cup (145 grams) firmly packed brown sugar
    • 2 tablespoons (25 grams) granulated sugar
    • 1 large egg + 1 large egg yolk
    • 3/4 cup buttermilk
    • 1 teaspoon vanilla extract
    • 1/2 cup (41 grams) Dutch cocoa powder
    • 1 cup (125 grams) all-purpose flour
    • 1/4 teaspoon baking soda
    • 1/2 teaspoon baking powder
    • 1/2 teaspoon kosher salt

Frosting

    • 2 ounces (55 grams) unsweetened chocolate, melted and cooled
    • 1 1/2 cups (180 grams) powdered sugar (sifted if lumpy)
    • 1/2 cup (4 ounces or 115 grams) butter, at room temperature
    • Pinch of fine sea salt
    • 1 tablespoons cream, milk, or half and half
    • 1/2 teaspoon vanilla extract

Heat oven to 350 degrees, place paper liners in a cupcake pan, and lightly grease the top of the pan with a little butter to help get the baked cupcakes out with minimal resistance. Combine the flour, cocoa powder, baking soda, baking powder, and salt in a medium bowl and stir with a fork or whisk to combine and break up any clumps of cocoa powder.

In the workbowl of your stand mixer, cream the butter and brown sugar on medium speed until fully combined and fluffy.  Reduce speed to low and add the egg, egg yolk, and vanilla and mix. Add the buttermilk and mix until combined.  The batter might look curdled at this point, and that’s ok.

Slowly add the flour mixture and mix on low speed until almost just combined.  Scrape down the sides of the bowl and give the batter a final mixing by hand to make sure there are no dry streaks of flour hiding at the bottom.

Spoon or scoop the batter into the prepared muffin tin and bake for 18 to 22 minutes, until a toothpick inserted into the center comes out clean. Let cool for 10 minutes in the pan and  then flip the cupcakes out onto a rack to cool completely before frosting.

Combine the melted chocolate, salt, and butter in a medium bowl and use a hand mixer to beat until smooth.  Add the powdered sugar and mix on low speed until fluffy.  Add the milk/cream/half and half to thin the frosting till it’s to your liking and then turn up the speed on your mixer for a minute for maximum frosting fluffiness.

Spoon or spread the frosting onto the cooled cupcakes and try not to gobble them down all at once….easier said than done.

 {printable recipe}

Peach Blueberry Basil Crumble

Peach Blueberry Basil Crumble

This crumble represents a celebration of sorts.  On this particular occasion I was:

Celebrating an afternoon spent with friends and indulging in laughter, retail therapy, and insanely good biscuits.

Celebrating progress getting Miss Libby into a new sleep routine.

Celebrating friends who love my child enough to read the same story over and over and do it in character voices.

Celebrating plans that go awry but end up working out the way they were meant to all along.

Celebrating glorious summer days where the trees dance in the breeze and the windows are open.

Celebrating the generosity of others who share their bounty with me.

Celebrating the support of friends and family who remind me that I’m not in any of this alone.

Does it get much better than that?

Peach Blueberry Basil Crumble

Adapted from Bon Appetit

BAH Note: This is what happens when  I buy peaches but don’t have time to wait for them to ripen enough to eat.  I start looking for what else I can do with them.  This particular time I had a perfect bunch of basil and a pint of blueberries.  I just threw them together and let the heat of the oven work its magic.  You can use whatever combination of fruit you have (peaches, plums, berries, cherries, whatever floats your boat) so where I called this Peach Blueberry Basil, you might call it something else entirely.  It goes without saying that if Basil ain’t your thing then skip that ingredient.  And word to the wise, put your dish on a baking sheet…bubbling fruit juice is rocket hot and that’s no joke.

  • 1/3 cup flour
  • 1/4 cup brown sugar
  • 1/4 teaspoon kosher salt
  • 1 cup old fashioned oats
  • 1 stick butter, chilled and cubed
  • 8 cups mixed fruit  (see Note above)
  • 1 cup sugar (if you want to get fancy, put the basil and your sugar in a small container, cover, give it a good shake, and then let it sit for a hour or so to allow the basil to infuse the sugar and the sugar to sort of crystallize the basil).
  • 2 tablespoons corn starch
  • fresh basil (I pinched off about three small bunches of leaves from my plant)
  • 2 tablespoons lemon juice
  • 1/2 teaspoon kosher salt

Heat your oven to 375 degrees.

Working in short pulses, combine the flour, brown sugar 1/4 teaspoon salt, and the oats in a food processor.  Add the cubed butter and continue to pulse until the butter is fully combined and no dry spots remain in the mixture.

If you put the basil in your granulated sugar, remove the basil, use your thumbnail to tear it into small bits, return it to the sugar, and give it one more good shake.

Place the fruit, granulated sugar, corn starch, basil, lemon juice, and 1/2 teaspoon salt in a large bowl and stir until fully combined.  Transfer the fruit to a baking dish and top with the oat mixture.  Bake for approximately 60 to 70 minutes or until the juices bubble and the topping browns.  Allow the crumble to cool for about an hour before digging in.

{printable recipe}

Homemade Magic Shell

Magic Shell

I’ve been hiding something and I need to finally set it free…I am impulsive.  There, I said it.  My impulsiveness comes in two different flavors.

There is the entitled impulsiveness like when I see a little something that makes me WANT it in the same way that my child WANTS damn near everything (as two year olds do).  That led to an embarrassing amount of consumer debt as I tried to keep up with all of The Joneses around me.  And I’m hard pressed to recall one single thing that I absolutely HAD TO HAVE in those moments.  Thankfully, that debt has been retired and I strive to be more mindful about the why when I feel WANT’S manic urge creeping up on me.

There is a productive impulsiveness that compels me to DO.  I’ll see a project and I simply won’t rest until I start working on it.  That would explain the random assortment of craft related items overtaking the limited storage space in my tiny house.  See, I’m better with the starting the projects than I am with the finishing.  For example, Libby just turned two and I have yet to finish creating the first year of her baby book.  But then again, this is the impulsiveness that gives me a creative outlet and I’ve got one hell of a nice felted wool blanket as proof that sometimes I stick it out and see a project through from start to finish.

Although maybe I am actually hounded by a third kind of impulsiveness…a hybrid of the WANT and the DO (WAND? DONT?)  This is the torment that comes from seeing something that I WANT (NOW!) and then focusing on how and when can I DO it.  And I mean a singular focus on when I can DO it.  Almost obsessive.

That’s how I came to experience Homemade Magic Shell.  That recipe showed up all around the internet and every time I saw it I wanted it desperately.  It made me pretty crazy until I could find the time to make a batch.  It was that itch that you just can’t reach no matter how much you stretch your arm behind your back.  And then, one day, it  happened.

I melted, cooled, and drizzled.  And I decided sometimes impulsiveness tastes like chocolate.

Magic Shell

Adapted from chocolateandcarrots.com

BAH Note:  Scale this recipe to your liking.  I like it too much to keep much of it on hand in it’s magical form so I only make this wee batch.

  • 1/2 cup chocolate chips (dark or milk, your choice)
  • 1 tablespoon coconut oil

Combine the ingredients in a microwave safe bowl.  Microwave on  high, stopping to stir every 15 seconds, until the chocolate and coconut oil are melted.

Carefully remove from the microwave and stir to combine thoroughly.  Once cooled to room temp it will magically firm up when you drizzle it over ice cream.

Any leftovers should be stored in an airtight container at room temp.

{printable recipe}

Brownie Ice Cream Sandwich

Brownie Ice Cream Sammich

What kind of crazy made me think  it was reasonable to order my child’s birthday present six days before her birthday and expect to get away with it?

The kind of crazy that comes from sleep deprivation.

Who in their right mind orders their child’s present three times, from three different vendors, and pays for expedited shipping, counting on at least one of them to show up in time?

Nobody in their right mind, obviously.

And that would be the same kind of mindless crazy that made me think I needed to see if I would like a brownie ice cream sandwich recipe.

I can’t believe I even considered such a question.  Seriously, what the hell was I thinking?  Brownie + ice cream = classic.  It’s the dessert equivalent of a little black dress.

I don’t yet know how the birthday present situation is going to end.  Two of the three orders have been cancelled and Amazon SWEARS that the Peppa Pig Playhouse will arrive in two days.  Only time will tell.

What I do know is that I need to exercise restraint when it comes to this brownie ice cream sandwich because it is ridiculously easy to make and it got enthusiastic thumbs up from every member of the household.  Which means it could make frequent appearances in our home.  Which means I might have easy access to brownies and ice cream on a regular basis.

I think I gained five pounds just considering that possibility.

Brownie Ice Cream Sandwich

Adapted from Smitten Kitchen

BAH Note: Deb used 8 inch square pans to bake her brownie layers.  I used 9 inch round pans, because that’s what I have in my kitchen.  Either one will give you thin brownie perfection. Since I used round pans, I turned a big circle into a square by cutting off the curves after the layers had been sandwiched together and frozen.  Those scraps may have been nibbled on to get a quick fix when nobody was looking….what you do with them is between you and your conscience.

Be sure to smooth out the batter as much as possible in your pan.  It’s pretty thick and takes some gentle convincing to cover the bottom of the pan.  Oh, and you need to clear space in your freezer to stash the cake pans as soon as they come out of the oven and to store your finished product.

According to Deb, “you can store the cut sandwiches in an airtight container or bag in the freezer as-is, or individually wrapped in squares of waxed paper. They should keep for at least two months in the freezer, but good luck with that.”

  • 3 ounces unsweetened chocolate, roughly chopped or broken
  • 1 stick butter
  • 1 cup granulated sugar
  • 2 large eggs
  • 1 teaspoon vanilla extract
  • 1/2 teaspoon kosher salt
  • 2/3 cup all-purpose flour
  • 1 1/2 pint ice cream, slightly thawed

Heat your oven to 350 degrees and line two cake pans (see note above) with baking parchment.

Melt the chocolate and butter in the microwave, cooking in 30 second increments and stirring in between.  Add the sugar and stir until completely combined before stirring in the eggs and salt.  Add the flour, folding it into the batter just until it disappears.

Spray your parchment lined pans with cooking spray and divide the batter between the two pans.  Use a spatula or spoon to smooth the batter out in the pans and bake for approximately 12 to 15 minutes or until a tester inserted in the brownie comes out clean.

Place the cake pans on a dish towel or pot holders and transfer to the freezer for approximately 20 to 30 minutes for the brownies to cool completely and become firm.  While the brownie layers cool in the freezer, set your ice cream out to thaw a bit.

Once the brownie layers have cooled, gently remove the brownie from one pan, peel off the parchment, and set the brownie on a plate.  Use a paper towel to wipe the cake pan clean and line it completely with parchment, freezer paper, or plastic wrap making sure it extends up the sides.  Return the brownie layer to the pan, placing the flat smooth side up facing you.  Remove the brownie from the second pan, discard the parchment, and set the brownie on a plate.

Working quickly, stir your ice cream so that it is spreadable and spoon or scoop it into your prepared pan.  Use a spoon or spatula to spread the ice cream into an even layer on top of the brownie.  Top with the second brownie, flat side down, and cover the top of the pan with plastic wrap.  Use the now empty cake pan to press down on the layers and return the stacked pans to the freezer.

Freeze for 45 minutes to 1 hour or until your sandwiches are completely frozen.  Use the parchment, freezer paper, or plastic wrap extending up the sides of your pan to remove the giant sandwich from the pan, transfer to a cutting board, and cut into single servings.

{printable recipe}

Peanut Butter and Jelly Cupcakes

cupcake ninja

Did you know that cupcakes can be so good that they need protection?  They can.  These are.  Let me  tell you how they came to be.

After stumbling across Movita Beaucoup’s delightful blog, courtesy of More Stomach, I added her feed to my reader.  Not long after that she had the nerve to post a recipe for one bowl yellow cake with lemon buttercream frosting.  Now I do love me a one bowl recipe as evidenced by my sworn allegiance to Abby Dodge’s Emergency Chocolate Cupcakes, so I had to investigate the Beaucoup. Luckily, Easter presented an opportunity to give them a go and they instantly won me over.

The cake is pillowy soft with an enjoyable tang from the buttermilk.  It makes a perfect canvas for whatever flavors you want to showcase.  For Easter I threw the zest of one lemon into the cake batter and then made a strawberry lemonade frosting.  They were a homerun.

Fast forward a few months and I was trying to find the perfect treat to make for my cousins who were visiting from Detroit.  I threw out a few options in a conversation that went something like this:

Me:  I can’t make a damn decision about what to bake for Cousins Birthday on Friday. Here’s the options….how about you pick:  Apple Upside Down Cake; Peanut Butter and Jelly Bars; Caramel Apple Muffins; One Bowl Yellow Cake with Lemon Buttercream Frosting.

Jen: Looking at recipes…I’m leaning towards the yellow cake or the pb&j bars!

Me: What do you think about the yellow cake with a jelly filling and peanut butter buttercream frosting?

Jen: Ummm. Amazing.  Omg. Pb frosting.  You’re a genius!

Me: As Daddy Pig tells Peppa, I am a bit of an expert ; )

So it was that I set about turning the easiest yellow cake into an homage to the classic pb&j sandwich.  I kept strictly to the cake recipe….no tweaks, no additions, no deviations.  Once the cupcakes had cooled, I used my favorite unitasker to make a hole in the middle for the jelly to hide…and those little cupcake cores may or may not have become a perfect little snack as I filled and frosted.  Next came the jelly and a generous dollop of peanut butter frosting.   All that was left to do was keep them safe until after dinner and shove them in our faces.

Hence, the ninja.

Peanut Butter and Jelly Cupcakes

Adapted from Movita Beaucoup and Brown Eyed Baker

BAH Note: I had to make a second batch of cupcakes because I overfilled the tin on my first batch which caused me to overbake the cupcakes and completely mangle the goods trying to get them out of the pan.  Learn from my mistake and don’t fill your pan any more than half full.  I ended up using about two tablespoons of batter per cupcake in the second batch and it was spot on.

I lost track of exactly how many cupcakes I got but this recipe will make approximately 12, or a single 8 inch round cake.  If you have a little batter leftover after filling your pan, drop cupcake paper into glass jars or custard cups and make a few extras for snacking…nobody has to know.

For the cupcakes:

  • 1 1/4 cup cake flour
  • 3/4 cup sugar
  • 1 3/4 teaspoons baking powder
  • 1/2 teaspoon salt
  • 6 tablespoons room temperature butter
  • 1/2 cup buttermilk
  • 1/2 teaspoon vanilla extract
  • 1 egg

Line a cupcake tin and heat your oven to 350 degrees.

Combine the flour, sugar, baking powder, and salt in the workbowl of stand mixer fitted with the paddle beater and mix on low for about one minute.

Add the butter and mix on low for about two minutes until the mixture resembles sand and no large bits of butter remain.

Add the buttermilk and vanilla and mix for about two minutes, scraping down the side of the bowl occasionally.  Add the egg and mix until combined.  Use a spatula to scrape down the sides and bottom of the bowl and give the batter a final mix to ensure no pockets of flour remain.

Fill each cup with approximately 2 tablespoons batter and bake for approximately 20 minutes or until a tester inserted in the center of a cupcake comes out clean.  Cool in the pan for about 15 minutes then remove the cupcakes from the pan to cool completely.

Remove a small core from each cupcake and fill the hole with your choice of jam, jelly, or preserve before topping with frosting.

For the frosting:

  • 1 cup powdered sugar
  • 1 cup creamy peanut butter
  • 5 tablespoons room temperature butter
  • 1/2 teaspoon vanilla extract
  • 1/4 teaspoon salt
  • 1/4 cup heavy cream

Place the powdered sugar, peanut butter, butter, vanilla and salt in the bowl of an electric mixer fitted with a paddle attachment. Mix on medium-low speed until creamy, scraping down the sides of the bowl as needed.  Add the cream and beat on high speed until the mixture is light and smooth.

{printable recipe}

Pudding Pops

Pudding Pop

Dear Libby,

I hope that you will always have golden summer moments like this one.

Love,

Momma

Pudding Pops

Adapted from Dorie Greenspan and The Craving Chronicles

BAH Note: These pops are ridiculously easy to pull together.  Just remember that they need time to do their thing in the freezer before they are ready to serve.  Of course, you can skip the pop part and just dive into the bowl of pudding.  Either way, you really can’t go wrong.

Many thanks to Theresa of The Craving Chronicles for introducing me to Dorie Greenspan’s pudding recipe. My apologies to Ms. Greenspan for monkeying with her process to make it fit my style.  Regardless of how I got there, the final product may change my life, or at least my waistline.

  • 2 1/4 cups milk, divided
  • 1 teaspoon vanilla extract
  • 5 tablespoons sugar, divided
  • 2 tablespoons unsweetened dark cocoa powder
  • 2 tablespoons cornstarch
  • 1/4 teaspoon salt
  • 1 large egg + 2 large egg yolks
  • 5 ounces bittersweet or semi-sweet chocolate
  • 2 tablespoons unsalted butter, cubed

Combine the butter and chocolate in a microwave safe bowl and microwave in 30 second increments, stirring between each, until the chocolate is melted.  Stir to completely combine the melted butter and chocolate and set aside.

In a medium bowl, combine 1/4 cup of milk, vanilla, 3 tablespoons sugar, cornstarch, egg and yolks.

Add the remaining ingredients (2 cups milk, 2 tablespoons sugar, cocoa powder, and salt) to a medium saucepan.  Whisk until the cocoa is thoroughly combined and the liquid looks like chocolate milk.  Cook over medium heat, stirring occasionally until the mixture just comes to a steam.

Working in several small batches, whisk 1/2 cup to 1 cup of the steaming milk mixture into the egg mixture and stir to combine.  Whisk the warmed egg mixture back into the saucepan and continue to cook over medium heat, stirring often, until the pudding thickens.  Remove from the heat and pour through a fine mesh strainer (to catch any bits of cooked egg) into another bowl.  Whisk in the melted chocolate mixture and stir until fully combined.  Cover the bowl with plastic wrap, pressing it down onto the top of the pudding, and refrigerate 4 to 6 hours or until completely chilled.  Spoon the chilled pudding into your molds and freeze.  Let the pops sit at room temperature for 10 to 15 minutes before serving.

 {printable recipe}

Apple Upside Down Cake

Apple Cake with Caramel Sauce

I have a love/hate relationship with CSA’s.  I love the premise…buying local fruits and vegetables to support the farms and growers in the area.   Or, as one of the more popular local CSA’s says:

Community Supported Agriculture (CSA) is a mutually beneficial relationship between farmers and the community. Participants provide funding for the farmer in advance of the growing season in exchange for produce when it’s ready. Items vary according to the season. They could be beets, lettuce, potatoes, tomatoes, a watermelon — whatever is ripe for picking.

Sounds like a win-win, right?  As much I want to say the answer is yes, I can’t.

Because a traditional CSA obligates you to participate every week for the length of the season. Considering that I don’t know what life is going to throw my way from week to week to week, how in the world does it makes sense for me to commit to 24 weeks of anything, let alone produce buying?  Not to mention the fact that despite my best intentions, sometimes the produce I bring home doesn’t get used up in a week.  It often lingers and takes up the limited amount of storage space in the crisper and on the counter.  If I manage to line up a weekend get away, I can skip my pickup but I’ve still paid for that week.  So in the larger picture the produce just got more expensive on a per item basis.

Selection flexibility varies by grower.  Some prepackage the shares which means that you get what you get.  Other growers allow you to pick your items week to week from whatever they have available.  There is no set guideline so it is up to each CSA to decide how much flexibility you get in selecting your items.

Did I mention that you pay up front for your spot?  Prices vary but a full share (typically 6-8 selections per week) will run between $500 and $600.  Averaged out, it’s about $20 to $25 per week which certainly is a great value.  But I would be hard pressed to come up with that kind of cash in a single transaction.  Sure you can sign up for a half share for a slightly lower cost or split a share with someone.  And some CSA’s even allow you to pay the cost in three or four payments.  Personally, cost has been probably the biggest factor preventing me from really jumping on the CSA wagon.

My last issue with CSA’s is that the pick up isn’t convenient for me.  Could I get myself to the farmer’s market at 8am on a Saturday?  I suppose.  But I’m not inclined to.  Could I arrange to get to a pickup location on a weekday?  That’s even less likely given that I’ve usually got a small person in tow and at the end of the work day, neither of us wants to sit in rush hour traffic to pick up some veg…we’d rather go home and veg.

These are the reasons that I have poo-pooed CSA’s.

But then I stumbled across a CSA, on Facebook of all places, that seemed like it had been created just for me.  There’s no long term commitment.  I get to decide from week to week if I want to purchase anything.  That alone makes me giddy.

No long term commitment means that I pay as I go.  So I don’t have to come up with a chunk of cash to “secure” my share at the beginning of the growing season.  That makes my checkbook happy.

There are multiple share sizes…fruit share, vegetable share, half share, full share, double share, dairy share, egg share.  The choices are almost dizzying.  So I’m able to select the option that is right for me.  As if that wasn’t enough flexibility, I can request a substitution here and there.  If they can accommodate the request, they do!  In my last pickup, I was able to sub out two butternut squash for the week’s kale and watermelon…I totally got the better end of that.  And if I want to add some a la carte items, I can do that too.  I’ve come home with local butter, bacon, and berries thanks to a bit of impulse buying at pick up.

As if that wasn’t enough to arouse my interest, I get a three day pickup window.  All I have to do is say which day and be there between Noon and 7pm.  Seriously, even I can fit in a ride down the highway at some point on a Saturday or Sunday….sometimes even a Monday if the stars align.  That makes my overprogrammed schedule happy.

My discovery of this Wendi-friendly CSA is how I came to be in possession of a crate of local Honey Crisp apples.  On a weekday afternoon.  At home alone.  When The Universe gives me this kind of gift, you better believe I take full advantage of it.

So I pulled out a recipe for Apple Cake with Caramel Sauce and got peeling, chopping, and baking.  I may have taken a few liberties with the recipe and had a complete fail on my first attempt to get the sugar to cook into caramel, but I reveled in the luxury of having the freedom to get my hands, and my pans, dirty, and in finding a CSA that works on my terms.

Apple Upside Down Cake

Adapted from Bon Appetit, October 2013

BAH Note:  Bon Appetit gave this a fancy French name but when you strip away all the fancypants Francais, it’s an apple upside down cake.  I think the cake shines brightly enough on its own that I’m saying the caramel sauce is optional.  If you’d like to exercise that option, click on the link to Bon Appetit above and you can access the caramel sauce recipe.

  • 10 tablespoons butter, melted and cooled
  • 2 tablespoons butter
  • 1 1/4 cups all purpose flour
  • 2 pounds tart apples (Pink Lady, Honey Crisp, Braeburn), peeled, cored, and sliced 1/2″ thick
  • 1 cup plus 2 tablespoons sugar
  • 1 teaspoon baking powder
  • 3/4 teaspoon kosher salt
  • zest of 1 lemon
  • 3 large eggs
  • 1 teaspoon vanilla

Heat oven to 350 degrees.  Line a 9″ round cake pan with parchment.  Butter and flour the pan and set aside.

Melt 2 tablespoons butter in a large skillet over medium heat.  Add apples and 2 tablespoons sugar and cook until the apples become golden brown, approximately 10 to 20 minutes, stirring occasionally.  Allow the apples to cool slightly while you prepare the cake batter.

Whisk together the flour, 1 cup sugar, baking powder, salt, and lemon zest in a medium bowl.  In a separate bowl, whisk together the eggs, melted butter, and vanilla.

Pour the egg mixture into the flour mixture and stir until just combined.

Spread the apples into the bottom of the prepared pan.  Pour the batter over the apples and bake until a tester inserted in the center of the cake comes out clean, approximately 35 to 45 minutes.  Transfer the cake to a rack to cool for about 10 minutes.  Flip the cake out of the pan onto the rack, remove the parchment, and allow the cake to cool completely.

{printable recipe}

No Bake Mint Thin Cookies

No Bake Thin Minty Cookies

Dear Pinterest,

You don’t know me.  But I think I know about all I need to about you.

On the surface, you seem innocent enough.  Lots of pretty pictures and inspiration swirling around like so many feathery party garlands, all for the taking.  Motivational quotes to help us be the people we imagine ourselves to be in our minds?  Got it.  Crafts to enrich our child’s young life experience?  Check.  Recipes that make us drool over their simplicity and perfection?  Roger.

In short, you’re too good to be true.

I submit the following:

  1. It took Google .27 seconds to return about 40,600,000 results when I searched “pinterest fail”.
  2. I just lost something like 30 minutes clicking on a few dozen of those 40,600,000 results.
  3. Websites the likes of Pinstrocity, Epic Pinterest Fail, and Pintester would not be relevant if our attempts to recreate these pins were successful more than they failed.
  4. Those perfectly styled photos are just that….perfectly styled.  They aren’t real life.
  5. Common sense says that if something is too good to be true, it probably isn’t true.

So Pinterest, as easy as it is to buy into the idea of a picture perfect life being only a click away, I’m going to keep living the life that says sometimes you have to give up on the idea of perfect and get your hands covered in some chocolate.

No Bake Minty Thin Cookies

Adapted from Top With Cinnamon

BAH Note: You don’t have to temper your chocolate but tempered chocolate will set up firm at room temperature and not need refrigeration.  And if you have a food processor…there’s no reason not to temper it.  Top With Cinnamon will show you how.  Clicky here for a lovely tutorial on the easiest method for tempering your chocolate.

I found it annoying to separate the cookies and scrape the filling.  Not to mention this resulted in lots of broken cookie bits that went into my mouth.  Yes, the “thin” part of the title is achieved by separating the cookie but the goal of chocolate coated cookies is easier to achieve if you leave the cookies whole.  You choose the approach you like best.

Oh, and I eventually gave up on dipping the cookies in the chocolate and letting the excess drip off.  My solution was to use a silicon pastry brush to slather a layer of chocolate coating all over the cookie.  It didn’t result in as thick a layer of chocolate but it also didn’t make me cry in frustration.

  • 30 to 40 Oreo cookies (if separating the Oreos, use 15 to 20)
  • 7 to 10 ounces bittersweet chocolate
  • 1 teaspoon mint extract

Line two sheet pans with parchment paper.

Separate the Oreo cookie halves, if you choose to.  If using halves, scrape the cream filling off the cookies.  Place the cookies on one of the sheet pans.

Melt and/or temper your chocolate.  Add the mint extract and stir it into the chocolate.

Dip the cookies into the melted chocolate using a fork (turning to coat both sides) or paint the cookies with the melted chocolate using a pastry brush.  Transfer the coated cookies to the other cookie sheet.  Allow the chocolate to set up (room temp for tempered or in the fridge for melted).  Store cookies in an airtight container.

{printable recipe}